
After booking a time in the agenda, a few days before the appointment, normally the secretaries or receptionists of clinics and offices are in charge of carrying out the process of confirming appointments, that is, getting in touch with the patient so that he can be sure that he will attend, or not.
Most of the time, this process can take a little time if we take into account the number of schedules for the day. This happens because, in addition to this task, the secretary performs several other functions in the clinic, as well as the receptionist, who needs time to receive the patients of the day, and collect their data for the registration form, among other obligations.
To facilitate the act of confirming patients, streamline the reception processes, and leave secretaries and receptionists with more free time, we will present below the three ways to carry out confirmations using the medical software Ninsaúde Apolo.
Confirmations screen
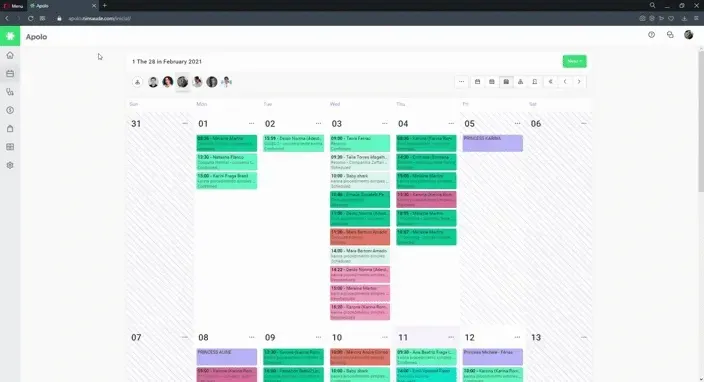
In the Agenda menu, the Ninsaúde Apolo user can access the Confirmations submenu, where it is possible to view all patients who have an appointment but have not yet confirmed their presence. To better understand it is necessary to know that, in the agenda, it is possible to modify the status of an appointment, which can be: Scheduled, Confirmed, Attended, Waiting, No-show, Canceled, and Rescheduled.
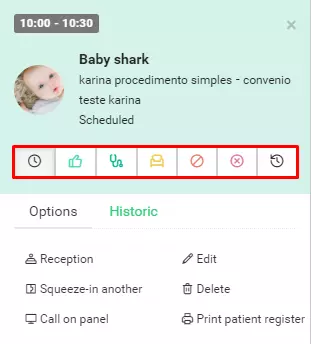
Therefore, all patients who have Scheduled status in the schedule, automatically appear in the confirmation list. If the patient gets in touch to notify him or her of not showing up, or if he/she wants to change the date of the appointment, it is possible to change the status in the agenda itself, and to do so, just click on one of the icons shown in the image above, which correspond to each one of them.
However, when there is a need for you to contact these patients, to speed up the process, just access the confirmation screen. In this space, you will have the list of unconfirmed patients, information about the schedule (date, time, a health professional who will assist you, etc.), as well as your phone number for you to contact.
When you get the answer from the patient, who will tell you if you are going to attend or not, with just one click you can confirm or cancel the appointment. Once this is done, the status change in the agenda is done automatically by the system. See the example below:
Confirmation via WhatsApp
To use confirmation via Whatsapp, the user must access the confirmation screen of Ninsaúde Apolo, where all appointments that have not yet been confirmed will be listed. By pressing the Whatsapp icon, the system opens a conversation with the patient containing an automatic message (which can be changed before sending) and a link. Through this link, the patient will confirm or cancel the appointment, and from his reply, the status of the appointment is changed automatically.
Confirmation via SMS
To use SMS confirmation, it is necessary to download the app through the link that is available on the home screen card (compatible only with Android so far). After making sure that the smartphone is properly configured, as well as the application settings, just access it so that the messages are triggered to all patients who have an appointment not yet confirmed.
For the SMS to be sent, we suggest that the clinic contact your operator to obtain a package with unlimited shipping. The patient, in turn, will need to respond to the message with a YES or NO.
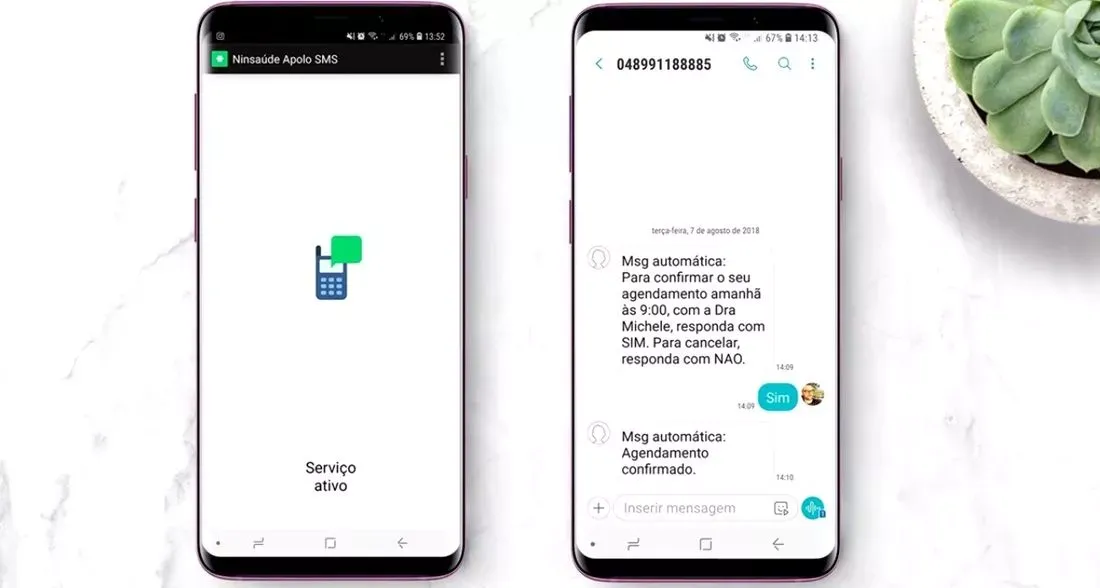
After receiving the patient's response, the application sends a command to the schedule, which updates the status of the appointment automatically. It is worth mentioning that the operators offer cheap plans with an unlimited amount by SMS, therefore, your clinic saves and still reduces absences on the agenda by up to 68%.
Now that you know how to confirm patients practically with Ninsaúde Apolo, your clinic will also be able to enjoy this benefit. If you are not yet a user of the software, contact us through the Apolo.app website and learn more.
